Dynamic avatars with Ruby are a common feature as we usually want to provide sensible default values without resorting to the same default avatar for every single user.
The most common solution to this issue is to generate them using the user's initials, default images or background colors.
These solutions are fine but we can do better: in this article we will learn how to create mesh gradient avatars using Ruby and the ChunkyPNG gem to improve our avatar game
Let's start by understanding what mesh gradients are:
What are mesh gradients
It's a type of gradient that uses a set of control points, each with its color to create smooth color transitions.
Unlike linear gradients, which transition between colors in a straight line, or radial gradients, which radiate outward from a center point, mesh gradients blend colors across multiple points simultaneously.
This creates a smooth and flowing pattern that is visually pleasing and organic in nature.
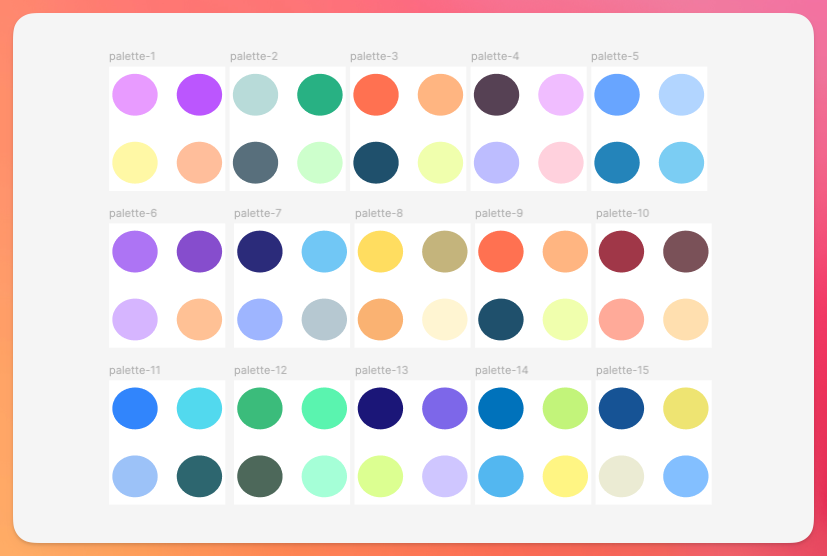
Let's see how mesh gradients look:

As you can see, these look very smooth and vibrant by combining multiple colors in different fashions and making them blend naturally.
This happens partly because colors blend in a way that makes it difficult to pinpoint where they start or end which makes them look organic because it resembles scenes like sunsets over water for example.
Let's start by understanding how to generate images with Ruby:
Generating images with Ruby
Instead of jumping straight into mesh gradients, let's understand how we can generate images with Ruby using the ChunkyPNG gem which is a library that can read and write PNG files, supports encoding and decoding for all the color modes and has read and write access to the image's pixels.
An image can be defined as a finite and discrete function from a 2D grid of coordinates where each coordinate represents a single pixel that encodes a vector in a color space.
In other words, an image can be defined as an array of coordinates where each coordinate has an associated color value.
For example, here we have an upscaled 32×32 image with a finite set of pixels that have an associated RGBA color:
So, let's pick a color from this article's cover (138, 122, 216), and make a 128×128 image that contains that color exclusively:
require 'chunky_png'

width, height = [128, 128]
color = [138, 122, 216]
image = ChunkyPNG::Image.new(width, height, ChunkyPNG::Color::TRANSPARENT)

height.times do |y|
  width.times do |x|
    image[x, y] = ChunkyPNG::Color.rgb(color[0], color[1], color[2])
  end
end

image.save("solid-color.png")
After running this script and opening the solid-color.png image, we get the following result:
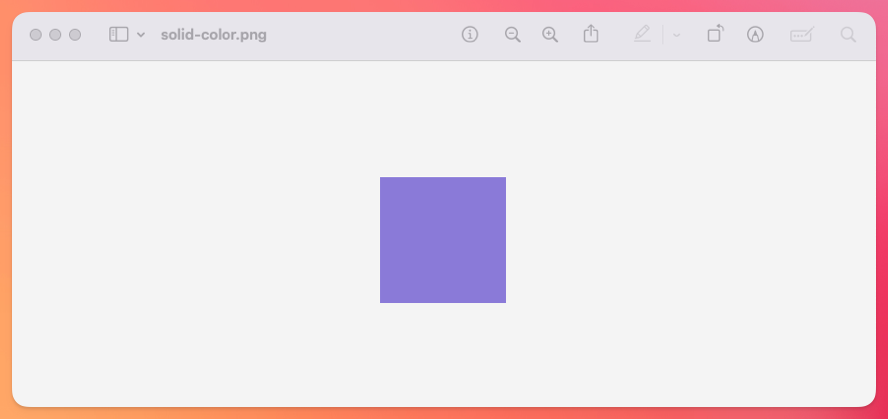
Of course, it's not much but it's a start: now we know that we can just iterate over a two-dimensional array and set the color of the pixel to our desired value using ChunkyPNG::Color.rgb or .rgba in case we want to use transparency.
With this in mind, let's think about how to generate a linear gradient between two points.
Generating a linear gradient
Now that we know how to assign colors to pixels, we need to figure out a way to produce a gradient and we need to start answering the question: what is a gradient?
A gradient is essentially a smooth transition between colors across a space that's produced by defining a given amount of colors that are increasingly close to each other.
The mathematical foundation for this is called linear interpolation which uses the following formula:
Result = A + t x (B - A)
Where t is a value between 0 and 1 that:
- When
t = 0we get our starting color. - When
t = 1we get our end color. - When
t = 0.5we get a color that's exactly between A and B.
As we're using the RGB (Red Green Blue) color space, which uses 3 vectors with a number between 0 and 255 to represent every possible color in this color space.
So, to produce a gradient, we have to calculate the values for R, G, and B for each coordinate in our image.
For a simple example using pure red (255, 0, 0) as a starting color and pure white as a finishing color (255, 255, 255).
If we try with t = 0 for the R component, we should get (255, 0, 0) because it's the starting color:
Result(R) = 255 + 0 x (255 - 255) => 255
Result(G) = 0 + 0 x (255 - 0) => 0
Result(B) = 0 + 0 x (255 - 0) => 0
Now, if t = 1 meaning we reached the end of the gradient, we should get white:
Result(R) = 255 + 1 x (255 - 255) => 255
Result(G) = 0 + 1 x (255 - 0) => 255
Result(B) = 0 + 1 x (255 - 0) => 255
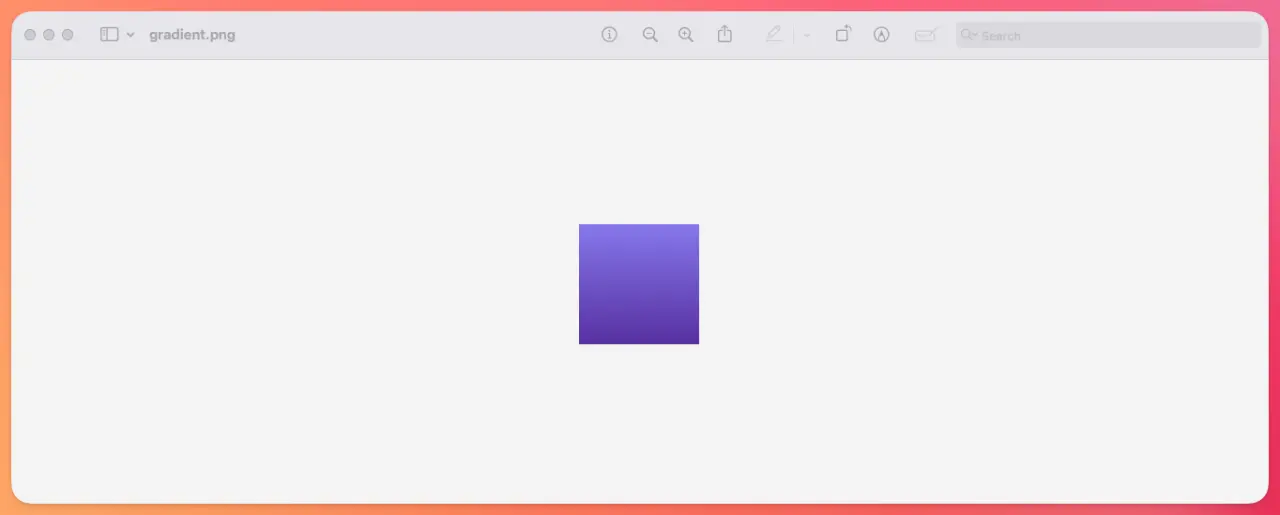
With this in mind, let's generate a top to bottom gradient with two colors from this article's cover:
require "chunky_png"

start_color = [134, 119, 235]
end_color = [87, 48, 161]
width, height = [128, 128]

image = ChunkyPNG::Image.new(width, height)

height.times do |y|
  # Calculate the interpolation factor (0.0 at top, 1.0 at bottom)
  progress = y.to_f / (height - 1)

  # Interpolate each color channel (Red, Green, Blue) separately
  red = (start_color[0] + (end_color[0] - start_color[0]) * progress).round
  green = (start_color[1] + (end_color[1] - start_color[1]) * progress).round
  blue = (start_color[2] + (end_color[2] - start_color[2]) * progress).round

  color = ChunkyPNG::Color.rgb(red, green, blue)

  width.times do |x|
    image[x, y] = color
  end
end
If you're wondering what the progress variable does, it interpolates the height value regarding the current y coordinate to produce a t value that starts at 0 and progressively increases to reach 1.
This produces a top to bottom gradient that looks like this:
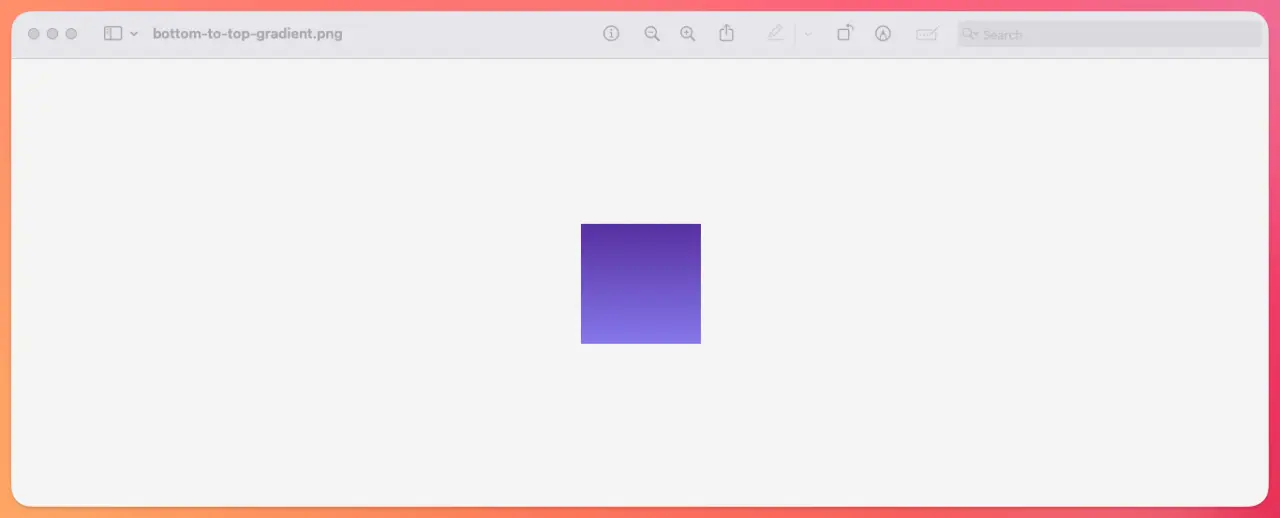
If we wanted to produce a bottom to top gradient, we just have to invert the progress factor to start at the bottom of the image:
progress = (height - 1 - y).to_f / (height - 1)
This produces the inverse gradient:
Angled gradient
Finally, let's make an angled gradient with a 45° angle. To make this happen, we have to convert the angle into radians, then calculate the direction vector for the angle, calculate the distance along the gradient and then use the progress to produce an interpolation between 0 and 1 to produce the desired color for each pixel:
require "chunky_png"

start_color = [134, 119, 235]
end_color = [66, 20, 114]
width, height = [128, 128]

angle = 45
angle_radians = angle * Math::PI / 180

# Direction vector
dx = Math.cos(angle_radians)
dy = Math.sin(angle_radians)

# Calculates the length of the gradient across the image
# as we're using a 45 degree angle, it's the hypothenuse
gradient_length = (width * dx.abs + height * dy.abs)

image = ChunkyPNG::Image.new(width, height)

height.times do |y|
  width.times do |x|
    # We get the distance along the gradient and then
    # interpolate it to a value between 0 and 1
    distance_along_gradient = x * dx + y * dy
    progress = distance_along_gradient / gradient_length

    red = (start_color[0] + (end_color[0] - start_color[0]) * progress).round
    green = (start_color[1] + (end_color[1] - start_color[1]) * progress).round
    blue = (start_color[2] + (end_color[2] - start_color[2]) * progress).round

    color = ChunkyPNG::Color.rgb(red, green, blue)
    image[x, y] = color
  end
end

image.save("angled-gradient.png")
Which produces the following result:

Now that we have a general idea of how to generate gradients, let's start with the process to generate our desired results:
Mesh gradients
We conceptually understand what mesh gradients are but producing them in Ruby is a different thing.
To produce convincing mesh gradients, there are basically four core components:
- A color palette: we will add a hand-curated color palette to avoid producing color combinations that are not pleasant or that produce undesired color clashes.
- Control points: these are like colored pins in our image. Each one of them has an associated position and a color that we will use to further interpolate to produce a nice-looking gradient.
- Interpolation: it's the math that calculates what color each pixel should be based on nearby control points.
Let's start this process by defining a set number of color palettes and adding a hex_to_rgba method to produce our desired results:
Color palettes
Automatic color palette generation is possible using color theory rules. They can automatically produce some nice color palettes while also producing unpleasant combinations.
To solve this, let's start this process by creating our color palettes in a software like Figma.
After this process, we may end up with something like this:
I'm selecting 4 colors for each palette with different strategies just to see what turns out when generating the gradients.
However, this process is subjective so you might want to experiment with the color combinations and see what works best for you.
After we have the colors, we will save them in a colors.yml file to keep the color management separate.
Color clustering
For our first method, we will use a color clustering approach where we select 3 to 4 color clusters based on a grid where every cluster has a center_x, center_y and radius properties.
These clusters do not directly affect the image rendering but we use them to make sure that we have a good distribution of the control points across the canvas.
This looks something like this:

Let's start building this by creating a MeshGradientGenerator class and initializing it by loading the colors we stored in the colors.yml file:
require 'chunky_png'
require 'yaml'

class MeshGradientGenerator
  attr_reader :size, :color_data

  def initialize(size)
    @size = size || 128
    @color_data = load_color_palettes
  end

  private

  def load_color_palettes
    file_path = File.join(File.dirname(__FILE__), 'colors.yml')
    YAML.load_file(file_path)
  end
end
Next, let's add a generate method which will return an instance of ChunkyPNG::Image with the correct pixels calculated based in the colors of our palette.
Let's start by picking a random color and initializing an empty image:
def generate(size)
  colors = color_data["palettes"].sample
  image = ChunkyPNG::Image.new(size, size, ChunkyPNG::Color::TRANSPARENT)
  set_pixels(image, colors)
end
Now, with this in place, let's start adding the generation functionality. The first step is to select the clusters by starting with a 2×2 grid and placing 3 to 4 clusters randomly in grid cells:
clusters = []
grid_size = 2
cell_size = size / grid_size # If our image is 256x256, the cell size is 128
num_clusters = 3 + (Random.rand * 2).floor # Defines the number of clusters to 3 or 4

available_positions = (0...grid_size).to_a.product((0...grid_size).to_a) # An array of available grid positions
For example, for a grid size of 2, the available_positions returns the following array:
[[0, 0], [0, 1], [1, 0], [1, 1]]
Which represent the top left, bottom left, top right and bottom right rows.
Then, we select the positions for our clusters by sampling from this array:
selected_positions = available_positions.sample(num_clusters)
For example, if we have 3 clusters, the selected_positions may return an array that looks like this:
[[1, 0], [1, 1], [0, 1]]
Meaning the clusters will be positioned in the top right, bottom right and bottom left rows.
The next step, is to convert this into actual pixel positions in the image:
selected_positions.each do |grid_x, grid_y|
  center_x = grid_x * cell_size + cell_size * (0.25 + Random.rand * 0.5)
  center_y = grid_y * cell_size + cell_size * (0.25 + Random.rand * 0.5)

  clusters << {
    center_x: center_x,
    center_y: center_y,
    radius: size * (0.2 + Random.rand * 0.1) # 20-30% radius of influence
  }
end
This populates the clusters array with hashes that look like this:
[{center_x: 215.40895602245428, center_y: 38.598171736451945, radius: 51.72047548558696},
 {center_x: 177.28426579501428, center_y: 192.72302748273432, radius: 58.384272136566565},
 {center_x: 72.54883269587445, center_y: 198.3578506255008, radius: 65.17937303653494}]
As the pixel position is calculated from (0, 0) with X increasing to the right and Y increasing to the bottom, the first cluster is located in the top right, the second cluster is located at the top bottom right and the third is located at the bottom left.
With this in place, now it's time to define the control points which are basically where we place the individual colors from our palette.
We start by defining an empty control_points array and defining the number of points:
control_points = []
num_points = 3 + (Random.rand * 3).floor # We set 3 to 5 points
Then, we run a loop for each point and assign a control point that has an x and y value and an associated color:
num_clusters.times do |i|
  cluster = clusters[i % clusters.length] # It adds at least one point to each cluster

  angle = Random.rand * 2 * Math::PI # 0 to 360 degrees in radians
  distance = cluster[:radius] * (0.5 + Random.rand * 0.5) # Uses between 50-100% of the selected radius

  x = cluster[:center_x] + Math.cos(angle) * distance
  y = cluster[:center_y] + Math.sin(angle) * distance

  # Clamping the values to make sure they don't exceed borders
  margin = size * 0.05 # 5% of margin
  x = [[margin, x].max, size - margin].min
  y = [[margin, y].max, size - margin].min

  control_points << {x: x, y: y, color: colors[i % colors.length]}
end
Here, we're adding control points within our clusters using the radius and a random angle to calculate the distance and make sure we stay within a margin by clamping the values.
The next and final step is to iterate over each pixel and calculate the color that each pixel should have by calculating the distance of the current pixel to each control point and then weighting the distance using the Gaussian weight formula.
Then, for each one of the control points we produced a weighted RGB value by adding the individual weights for every point.
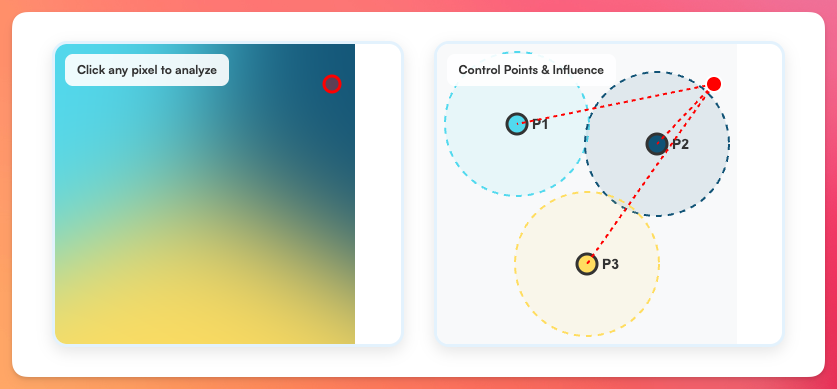
Finally, we calculate the final pixel color by dividing the weighted color value by the weight value we calculated using the Gaussian formula.
INFLUENCE_FACTOR = 0.28

size.times do |y| # 256 rows
  size.times do |x| # 256 columns per row
    total_weight = 0
    # We start with a black pixel
    weighted_red = weighted_green = weighted_blue = 0

    # We iterate over each control point and calculate the color for a given pixel
    # taking each one of the points into consideration. Think about it as mixing
    # the 3 colors considering the distance of the pixel to each one of them.
    control_points.each do |point|
      # We calculate the distance from the current pixel to every control point using the Euclidean formula.
      # In other words: we calculate how far each is pixel is from every control point.
      distance = Math.sqrt((x - point[:x])**2 + (y - point[:y])**2)


      # We use the Gaussian weight formula which assigns higher weights to closer pixels
      # while distant pixels get lower weights. The sigma value controls how the influence
      # falls off.
      sigma = size * INFLUENCE_FACTOR
      weight = Math.exp(-(distance ** 2) / (2 * sigma ** 2))

      total_weight += weight
      weighted_red += point[:color][0] * weight
      weighted_green += point[:color][1] * weight
      weighted_blue += point[:color][2] * weight
    end

    total_weight = [total_weight, 0.01].max # We clamp the total_weight factor

    # We clamp the values to make sure they're betwen 0 and 255
    final_color = [
      [[0, (weighted_red / total_weight).round].max, 255].min,
      [[0, (weighted_green / total_weight).round].max, 255].min,
      [[0, (weighted_blue / total_weight).round].max, 255].min,
    ]

    # We setup the color value for the current pixel
    image[x, y] = ChunkyPNG::Color.rgb(final_color[0], final_color[1], final_color[2])
  end
end
If you need to try this, the final shape of the code is:
require 'chunky_png'
require 'yaml'

class MeshGradientGenerator
  include Utils
  include Blob

  attr_reader :size, :color_data

  def initialize(size)
    @size = size || 128
    @color_data = load_color_palettes
  end

  def generate
    colors = color_data["palettes"].sample["colors"]
    image = ChunkyPNG::Image.new(size, size, ChunkyPNG::Color::TRANSPARENT)

    set_pixels(image, colors)
    image
  end

  def set_pixels(image, colors)
    clusters = []
    grid_size = 2
    cell_size = size / grid_size
    num_clusters = 3 + (Random.rand * 2).floor

    available_positions = (0...grid_size).to_a.product((0...grid_size).to_a)
    selected_positions = available_positions.sample(num_clusters)

    selected_positions.each do |grid_x, grid_y|
      center_x = grid_x * cell_size + cell_size * (0.25 + Random.rand * 0.5)
      center_y = grid_y * cell_size + cell_size * (0.25 + Random.rand * 0.5)

      clusters << {
        center_x: center_x,
        center_y: center_y,
        radius: size * (0.20 + Random.rand * 0.15)
      }
    end

    control_points = []
    num_points = 4 + (Random.rand * 3).floor

    num_clusters.times do |i|
      cluster = clusters[i % clusters.length]

      angle = Random.rand * 2 * Math::PI
      distance = cluster[:radius] * (0.5 + Random.rand * 0.5)

      x = cluster[:center_x] + Math.cos(angle) * distance
      y = cluster[:center_y] + Math.sin(angle) * distance

      margin = size * 0.05
      x = [[margin, x].max, size - margin].min
      y = [[margin, y].max, size - margin].min

      control_points << {
        x: x,
        y: y,
        color: colors[i]
      }
    end

    size.times do |y|
      size.times do |x|
        total_weight = 0
        weighted_r = weighted_g = weighted_b = 0
        INFLUENCE_FACTOR = 0.28

        control_points.each do |point|
          distance = Math.sqrt((x - point[:x])**2 + (y - point[:y])**2)

          sigma = size * INFLUENCE_FACTOR
          weight = Math.exp(-(distance**2) / (2 * sigma**2))

          total_weight += weight
          weighted_r += point[:color][0] * weight
          weighted_g += point[:color][1] * weight
          weighted_b += point[:color][2] * weight
        end

        total_weight = [total_weight, 0.01].max

        final_color = [
          [[0, (weighted_r / total_weight).round].max, 255].min,
          [[0, (weighted_g / total_weight).round].max, 255].min,
          [[0, (weighted_b / total_weight).round].max, 255].min
        ]

        image[x, y] = ChunkyPNG::Color.rgb(final_color[0], final_color[1], final_color[2])
      end
    end
  end

  private

  def load_color_palettes
    file_path = File.join(File.dirname(__FILE__), 'colors.yml')
    YAML.load_file(file_path)
  end
end
Now, we can write a simple script to generate a given number of avatars and save them to disk:
require_relative 'mesh_gradient_generator'

size = 128
generator = MeshGradientGenerator.new(size)

30.times do |i|
  result = generator.generate
  filename = "output/example-#{(i + 1).to_s}.png"
  result.save(filename) # We call save on the ChunkyPNG::Image instance

  puts "#{i + 1} - #{filename}"
end
After running this script, we get the following result:
After running a benchmark for this, the average time needed to generate a 128x128 avatar is 100 ms and for 256x256 is 350 ms.
Of course, Ruby is not really the language to pick if we have to squeeze performance out of tasks like image generation but using this approach to dynamically generate avatars, which are don't usually need to be too big, is acceptable.
Deterministic avatars in Rails
Now that we know how to generate credible mesh gradients using Ruby, let's create a Rails application that's in charge of generating deterministic avatars from an input.
This means that we produce the same avatar as long as the input is the same, which is very useful to generate dynamic avatars while also keeping consistency for our users.
Let's start by creating a new Rails application:
rails new avatars --css=tailwind
Next, let's add a route that is responsible for returning an avatar when called:
get "avatar/:id", to: "avatars#create"
The next step is to add the code for the MeshGradientGenerator and the colors.yml file in the lib directory and modify the load_color_palettes method with the following:
def load_color_palettes
  path = Rails.root.join("lib", "colors.yml")
  YAML.load_file(file_path)
end
Then, let's add the controller and action for this endpoint where we call the MeshGradientGenerator we created in the previous steps:
# app/controllers/avatars_controller.rb
class AvatarsController < ApplicationController
  def create
    avatar = MeshGradientGenerator.new(128).generate # Instance of ChunkyPNG::Image
    send_data avatar.to_blob, type: "image/png", disposition: inline
  end
end
With this in place, we get the following result:
However, as you can see, a different avatar is generated every time even though the id is the same.
To achieve truly deterministic avatars, we need to introduce the concept of a Linear Congruential Generator (LCG) which is a pseudorandom number generator that can generate the same sequence of random numbers starting from a seed.
As we use many Random.rand instances in our avatar generator, we will replace them with an rng lambda that returns the same value for each subsequent call as long as the seed is the same.
For example, if we have a seed of abcd we get the following values:
seed = 123456
rng = seeded_random(seed)
rng.call # First call =>  0.634674724952632
rng.call # Second call => 0.27528032580170797
rng.call # Third call => 0.02930058493712013
rng.call # Fourth call => 0.1504786518171796
Then, if we used the same seed, we would get the same values for each sequential call and we could use those values to pick the colors, control points and every thing that makes our avatar generation random.
Without getting too deep into the algorithm, we define the seeded_random method which returns a lambda that keeps track of the state using the seed we provide and produces different numbers for each call we make:
def seeded_random(seed)
  m = 0x80000000 # 2**31
  a = 1103515245
  c = 12345
  state = seed&.hash&.abs || Random.rand(m - 1)

  lambda do
    state = (a * state + c) % m
    state.to_f / (m - 1)
  end
end
Then, we replace every Random.rand call with a call to the rng variable just like in the following line:
num_clusters = 3 + (rng.call * 2).floor
Then, in the controller, we add the following:
class AvatarsController < ApplicationController
  def show
    seed = params[:id].to_s
    size = params[:size].to_i.clamp(128, 512)
    avatar = MeshGradientGenerator.new(size, seed).generate

    send_data avatar.to_blob, type: "image/png", disposition: "inline"
  end
end
This produces the following result: as long as the seed stays the same, the produced avatar is the same:
We now have a functioning application capable of generating mesh gradient avatars on the fly using nothing but Ruby.
There's still some work needed to launch this to production like adding rate limiting, caching with a CDN, and contemplating edge cases but this is a good starting point.
Summary
In this article, we learned how to create mesh gradient avatars using nothing but Ruby with the ChunkyPNG.
We started by learning how to generate a two-color gradient using interpolation.
Then, we approached some of the most common issues that can arise when generating avatars dynamically by using a color clustering approach where we divide the image using a grid, pick which part of the grid to add the clusters to and then add control points, a.k.a. the actual colors, which are used to calculate the color for every pixel.
After this, we calculate the color for each pixel by using the distance from each pixel to each control point (colors in our palette) and the Gaussian formula to make sure that the color increases its influence non-linearly as pixels get closer to it.
For example, if we have a blue, cyan and yellow palette and we want to calculate the color for a pixel that's near to the blue control point, the pixel should be influenced by the blue color way more than it's influenced by the yellow and cyan points.
We can use this basic approach to generate a greater variety of gradients by playing with the way we place the control points or we calculate the influence.
However, this approach produces good results with acceptable performance.
I hope you enjoyed this article and that it can help you with your projects. Let us know if you know about other ways to achieve similar results.
Have a good one and happy coding!
