Confetti is one of those things that are fun regardless of your age: it's magical when you're 6, and it keeps being so when you're way older.
In the development realm, we can use confetti to celebrate occasions like birthdays, usage anniversaries or even particular actions that we might want to cheer.
In this article, we will learn how to add confetti to any application or website that uses Stimulus using the stimulus-confetti library, which, along with the Active Storage blurhash, is one of the libraries created with love at Avo.
Let's start by seeing what we will build and then learning how to add it to any application or website.
What we will build
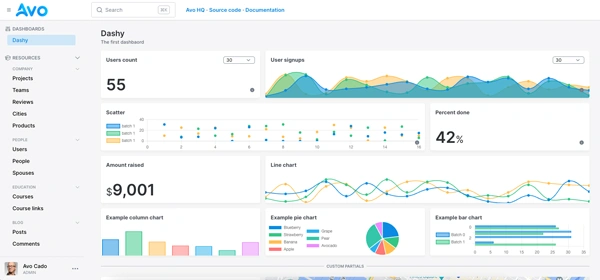
Unlike other occasions, like for the Active Storage S3 uploads article, we will build a simple application that allows us to showcase how the library works and the different configurations you might use.
It will consist of a series of buttons that, when clicked, will display a customizable confetti rain before following the link's href path.
Besides that flow, which is the default, we will showcase a set of buttons with different confetti styles that don't follow the link after being clicked.
These are more useful for flows where we might want to hijack the link follow to perform other actions, like a POST request for a checkout form, for example.
The final result looks something like this:
Application setup
Whether you're using Stimulus in a Rails app or otherwise, the first step will be to install stimulus-confetti.
When using Rails with import maps, we run the following command:
$ bin/importmap pin stimulus-confetti
Otherwise, if we're using a JavaScript bundler like Bun, ESBuild, Webpack or Rollup.js we can install it to our bundle using:
# bun
$ bun add stimulus confetti
# yarn
$ yarn add stimulus-confetti
# npm
$ npm install stimulus-confetti
This will make the Confetti class, where the actual behavior is defined, to be imported anywhere we need it.
Next, we want to register the controller in our Stimulus application, which defines the application object:
import { Confetti } from "stimulus-confetti"

application.register('confetti', Confetti)
The code above means that the Confetti class will be run in the context of the confetti controller, and that we're ready to use the library by declaring DOM elements that implement it.
If you are not running a Rails application, you just need to install the library by running the command with your preferred package manager and register the controller with the method explained above. Everything else should stay the same.
Using the library
After we're done with the setup, we can start displaying confetti by declaring DOM elements that follow the library specifications.
By default, the library works by declaring a link tag with the appropriate attributes, which are used to set how the controller displays the confetti and what it does after.
<a href="/thank-you"
    data-controller="confetti"
    data-action="click->confetti#spray">
    Basic 🙂
</a>
This will render a button which, when clicked, will show the basic confetti animation and, after 5 seconds, follow the link to the thank-you page.
The library comes with 3 different animations:
- Basic: a playful confetti that gets “shot” from where our mouse pointer is.
- School pride: a bi-colored confetti display that resembles a parade. It gets “shot” from the middle of the left and right sides of the screen.
- Stars: like its name suggests, it displays little stars that come in two colors that are “shot” from where our mouse pointer is.

Besides configuring the animation type, we can also configure the following aspects of the confetti rendering:
-
Animation duration: this property controls the animation duration, but it's only effective for the
school-prideanimation. It's set to 5 seconds by default. We can change it using thedata-confetti-duration-value. -
First and second colors: this allows us to set the colors for the
school-prideandstarsanimations that use two colors, using thedata-confetti-first-color-valueanddata-confetti-second-color-value. -
Debug mode: if we want log messages to be displayed in the console, we have to set the
data-confetti-debug-valueto “true”.
Internal configuration
Besides the configuration options we mentioned before, the library allows us to customize things even further by providing us with access to the following properties using Stimulus values:
-
Particle count: the actual number of confetti that gets launched. It defaults to 100, but you can play with that number if you want more or less confetti. It uses the element's
data-confetti-particleCount-valueattribute. -
Start velocity: how fast the confetti will start going in pixels. It defaults to 20. We can control it using the
data-confetti-startVelocity-value. -
Spread: it controls how far off the center the confetti can go, in degrees. In other words, how narrow the confetti launch is. By default, it's set to 360. We can customize it using the
data-confetti-spread-valueattribute. -
Ticks: it controls how many times the confetti will move. We can control it using the
data-confetti-ticks-valueattribute.
Launching confetti without a visible button
For some use cases, like celebrating a user login into our application on her birthday, we may need to render confetti without displaying a button on the screen.
To achieve this, we can add a little JavaScript via a <script> tag or a Stimulus controller to automatically click a hidden button to show the confetti to our users.
Because it's a basic use case, we will just use a script tag:
<a
  target="_blank"
  href="/thank-you"
  data-controller="confetti"
  data-action="click->confetti#spray"
  data-confetti-follow-value="false"
  data-confetti-animation-value="school-pride"
  data-behavior="hidden"
  class="hidden px-6 py-2 bg-black text-white text-sm font-medium rounded-full hover:bg-gray-800 transition-colors duration-300"></a>
<script>
  document.addEventListener("turbo:load", () => {
    const confettiLinks = document.querySelectorAll("[data-controller='confetti']");
    Array.from(confettiLinks).filter((link) => link.dataset.behavior === "hidden").forEach((link) => {
      link.click();
    })
  })
</script>
The result looks like this:
TL;DR
If we want to add confetti to our Stimulus application, stimulus-confetti is a quick and easy way to do it.
We just need to install the library using our package manager of choice: yarn add stimulus-confetti and then register the Confetti controller within our Stimulus app:
import { Confetti } from "stimulus-confetti"
application.register('confetti', Confetti)
We can now use it by declaring link elements in the DOM with the appropriate attributes:
<a href="/destination"
   data-controller="confetti"
   data-action="click->confetti#spray">Basic confetti</a>
Then, we can customize whether we want to have the link to redirect us after the confetti is displayed with the boolean data-confetti-follow-value.
We can also customize the animation type: basic, school pride or starts using the data-confetti-on-animation-value.
The other things we can customize are:
- The color combination for the
startandschool-prideanimations, using thefirstColorandsecondColorvalues. - The animation duration using the
durationvalue. - The debug mode using the
debugvalue.
If we really want to dig deep into how the confetti is rendered, we can also customize some canvas-confetti internals using the: particleCount, spread, ticks and startVelocity values.
Now you know: if you need to add confetti to any application using Stimulus, this library is the solution for you.
I hope you enjoyed the article. Happy coding and happy partying with confetti!

