Handling file uploads in Rails applications has never been easier.
With Active Storage, we can be up and running in a matter of minutes with local uploads and, with some extra effort, we can get cloud uploads rapidly.
In this article, we will learn how to set Cloudflare R2 with Active Storage to use it as our cloud provider and also use Cloudflare's CDN so we get fast
Why use R2 for object storage?
R2 is Cloudflare's object storage offering. It's relatively recent, as it was officially released in September 2022.
If you've added cloud storage to a Rails application, you've probably used something like AWS S3, which seems to be the most common choice for developers nowadays.
But, an alternative like R2 has the following advantages over S3:
- No egress fees: this is what you pay for retrieving the stored data.
- S3 compatibility: its API is fully compatible with S3, which means we can reuse our own or third-party integrations with the AWS service. Migrating out of S3 or any S3-compatible service like Digital Ocean Spaces is easier.
- Globally distributed: our stored objects can be accessed from the more than 125 edge locations that Cloudflare has. This means that we don't need to add a CDN on top of it, like we did in the CDN with Active Storage article. Note that the Cloudflare offers 6 bucket locations: Asia-Pacific (apac), Eastern Europe (eeur), Eastern North America (enam), Oceania (oc), Western Europe (weur) and Western North America (wnam), but the objects get distributed along their global network when they're accessed by users.
- Simplified pricing: R2 offers a simplified pricing where we get 10 GB per month of free storage space plus 10 million “Class B” operations which read existing state and 1 million “Class A” operations which mutate state. After we pass those limits, each GB of storage costs $0.015, each million of reads costs $0.36 and each million of mutations costs $4.5.
- Better developer experience: working with the Cloudflare dashboard feels like a breeze compared to AWS. The interface is cleaner and more understandable, which results in a better experience overall.
Application setup
We will build a simple application where users can create posts and upload cover images, just for the sake of demonstrating that the integration works.
Let's start by creating the application:
rails new cloudflare_r2 --css=tailwind
Let's also install Active Storage so it copies the required migrations for blobs, attachments, and variants:
bin/rails active_storage:install
Next, let's create a simple Post model that with a title, a body and an attached cover:
bin/rails generate scaffold Post title body:text cover:attachment
Which will generate a scaffold with the associated cover:
class Post < ApplicationRecord
  has_one_attached :cover
end
Finally, let's run the pending migrations
bin/rails db:migrate
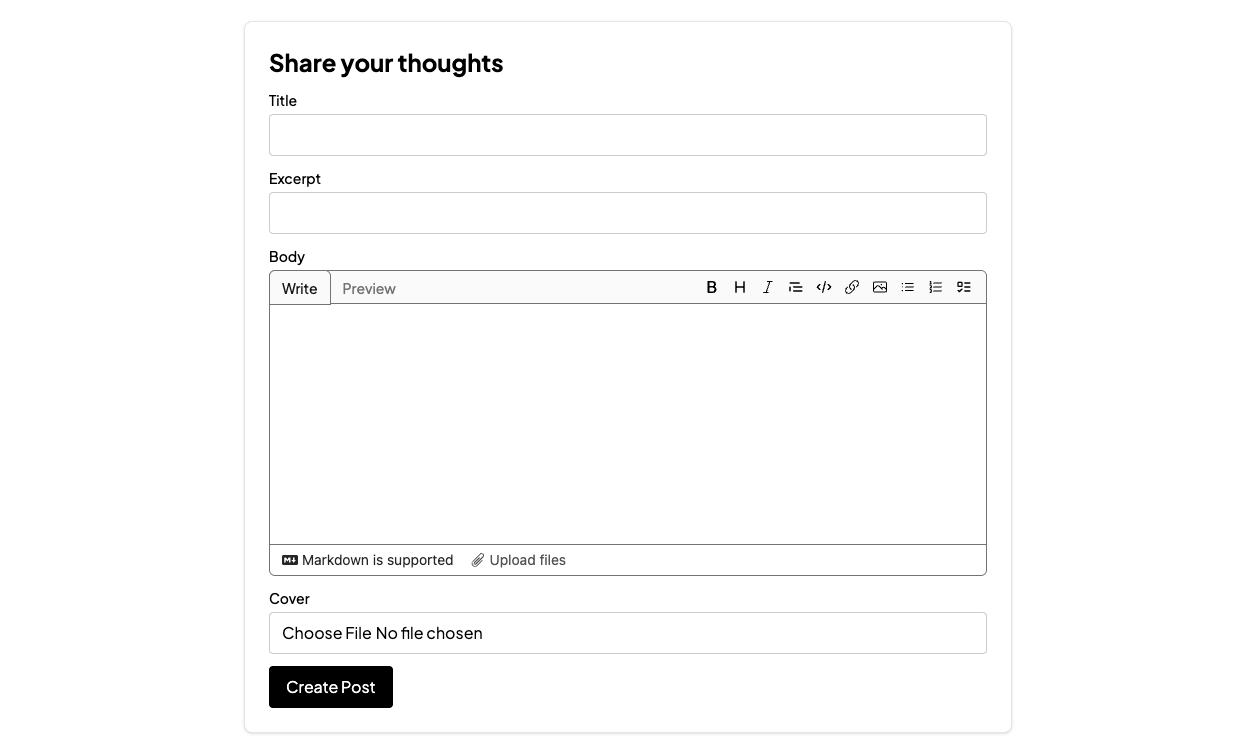
After some work on the scaffold visuals using Tailwind and using our own Marksmith markdown editor for Rails we get the following:
R2 configuration
The first step of the process, given that you have a Cloudflare account, is to create a new bucket.
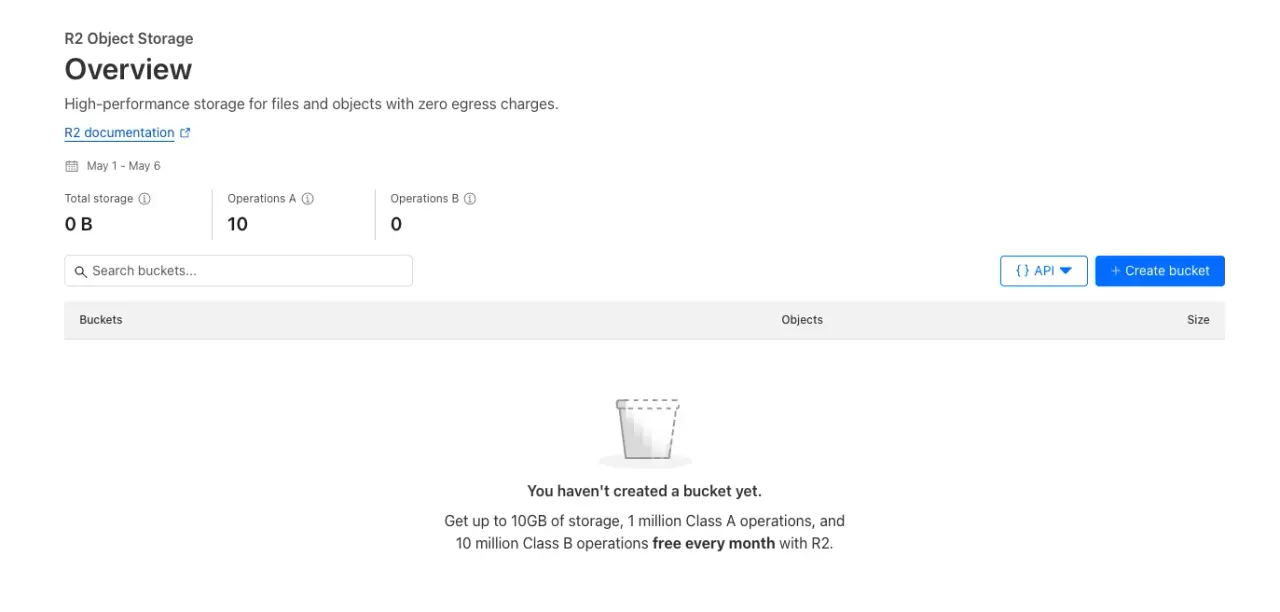
From the Cloudflare dashboard, we have to navigate to the “R2 Object Storage” link, which currently sits below the “Storage and databases” option on the sidebar.
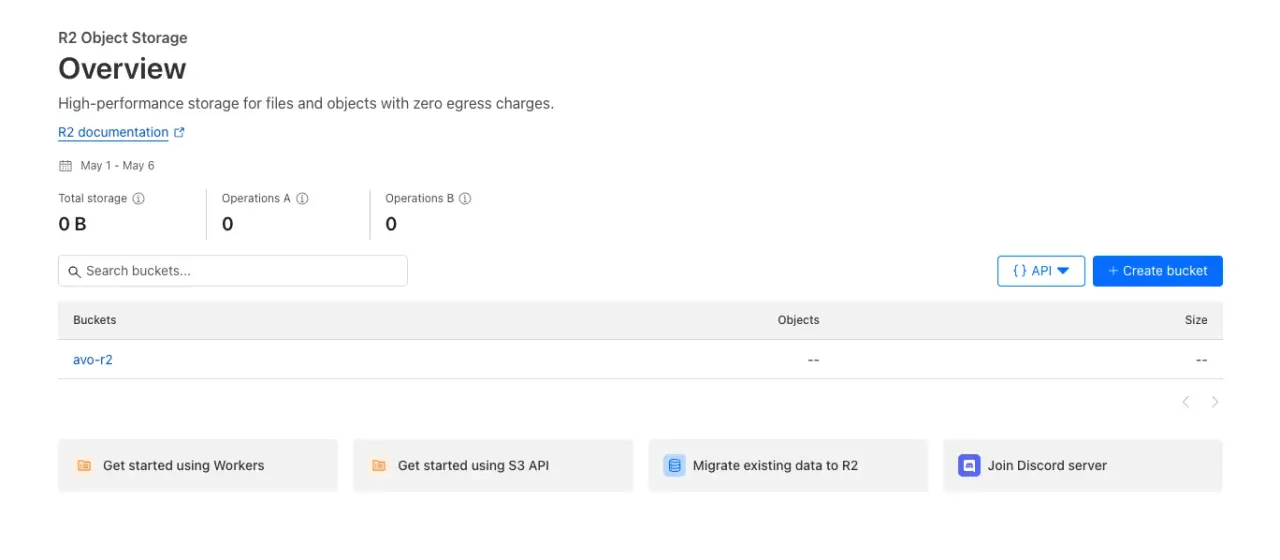
After navigating to it, we should see a list of the buckets associated with our account. Logically, if we haven't created one, yet it should be empty.
Next, we click on the “Create bucket” button, and then we should see the following:
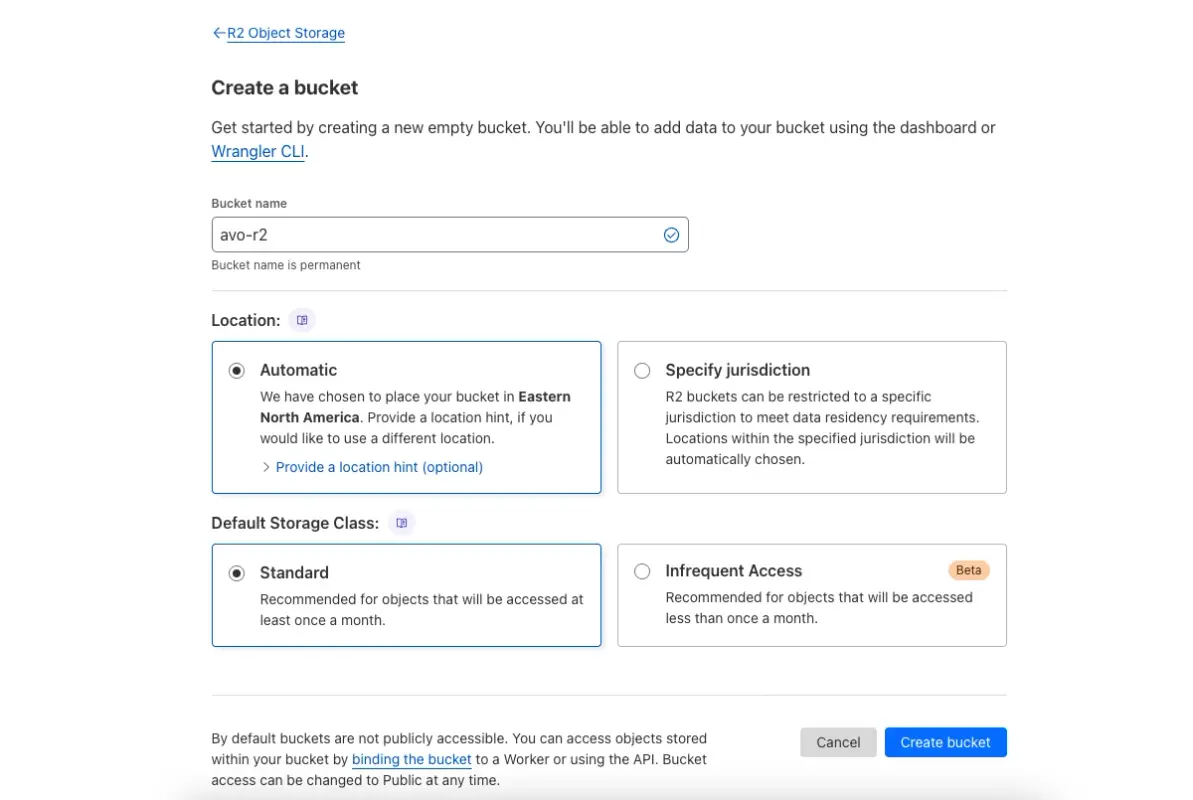
We just have to give our bucket a name, avo-r2 in our case, and change the location and storage class if we need to. Otherwise, we can leave the default options.
After we click on the “Create bucket” button, we should get redirected back to the bucket overview, but this time we should see the recently created bucket on the list:
The next step is to create an API token to use with Active Storage when uploading files. To create a token, we have to click on the “{} API” button, which will show a dropdown:
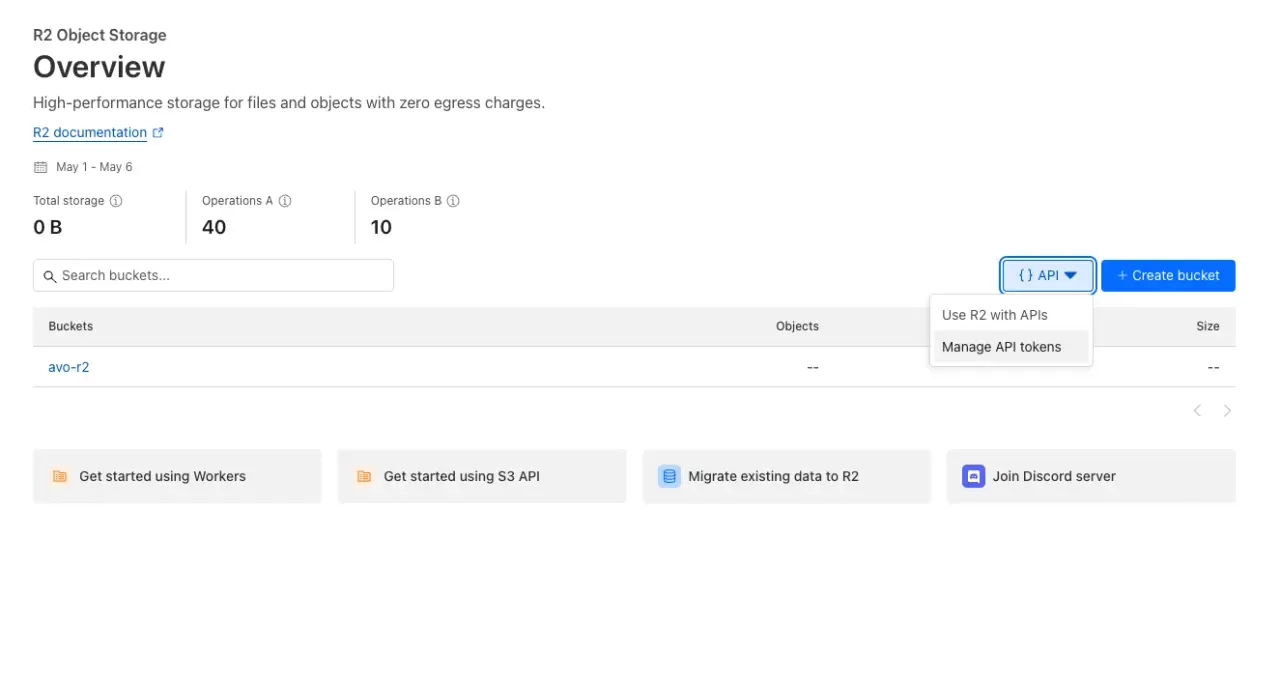
Then, we click on the “Manage API tokens” link, which should take us to the following screen:
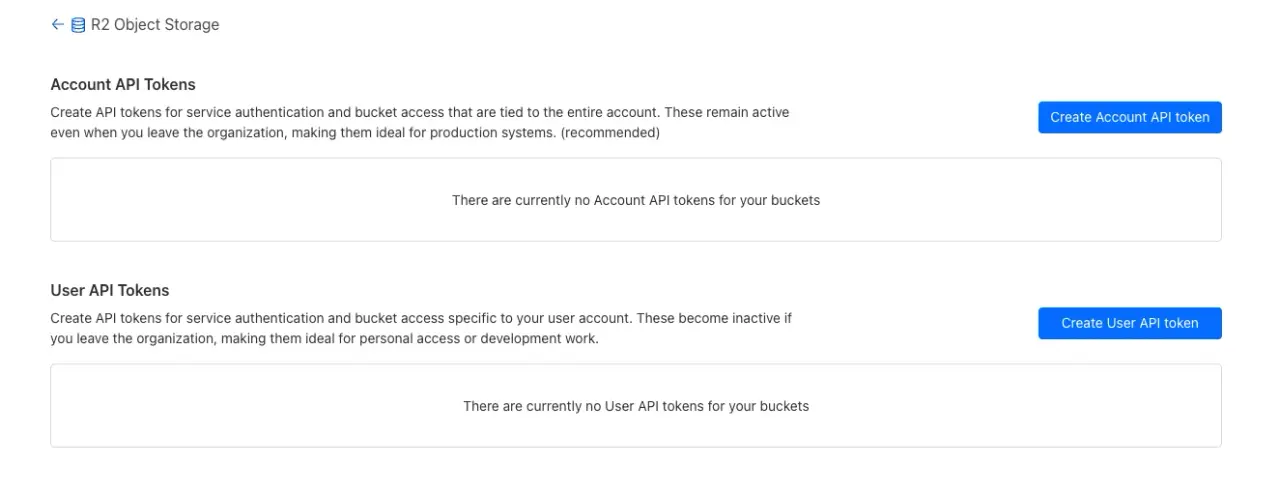
Next, we click on the “Create Account API Token” button because we just need an API key associated with our account for now, and we should see:
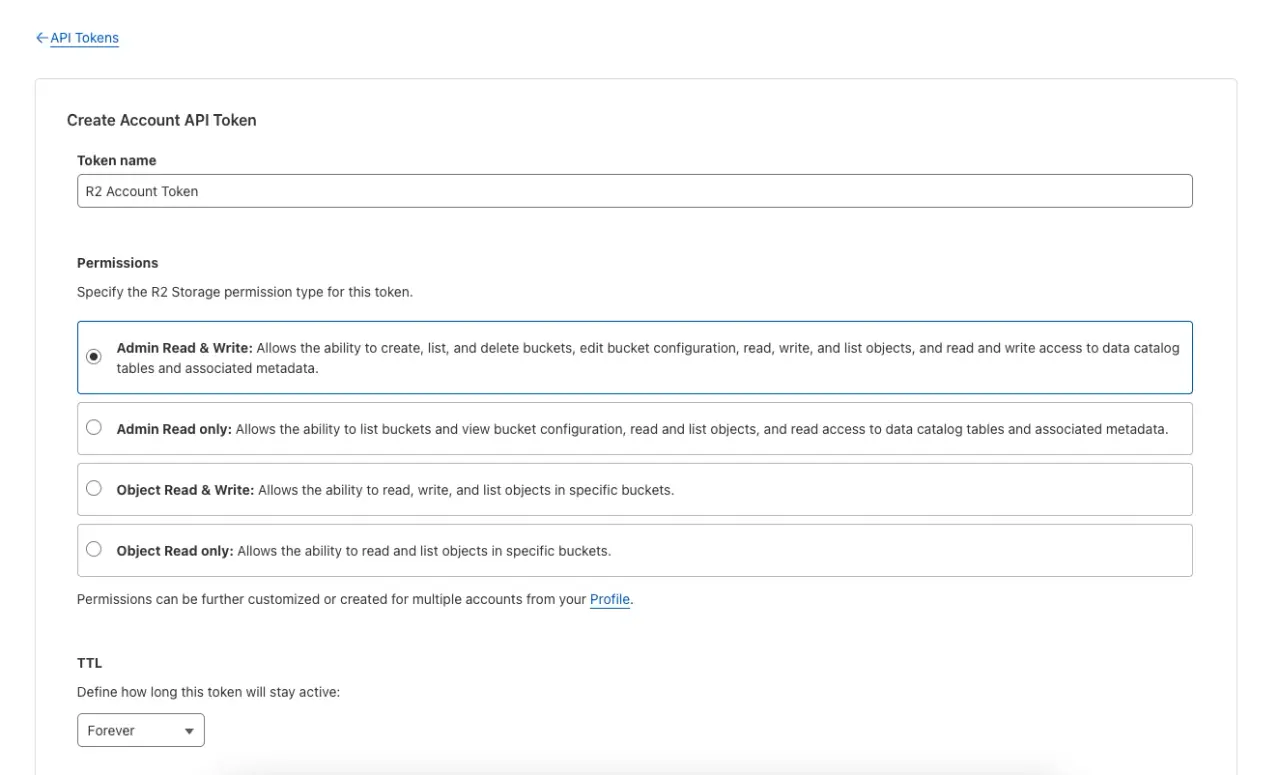
Here, we can configure the following:
- Token name: we can give the token a name if pertinent.
- Permissions: because we want to handle uploads from our Rails app, we have to give “Admin Read & Write” permissions to this token.
- TTL: set to “Forever” by default, but we can change it if we need the token to expire earlier.
- Client IP Address filtering: we can limit the IP address that can use the token. Unless you want to filter the access to the token, you can safely leave this empty.
Next, after confirming the setup values, we should see something like this:
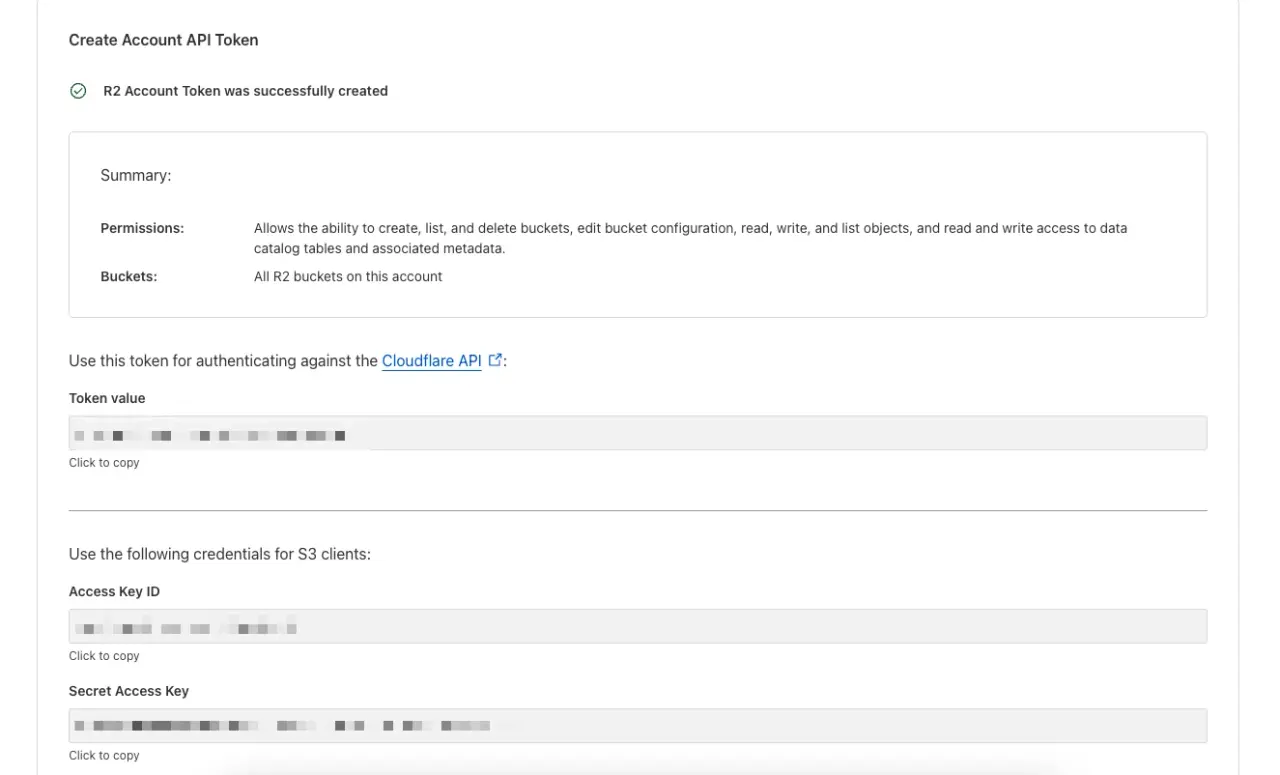
This provides us with access to four different values:
- Cloudflare API token: we can use this token to authenticate requests to the Cloudflare API.
- Access Key ID and Secret Access Key: these credentials are used to replace AWS credentials when using S3-compatible clients, like we will.
- Jurisdiction-specific endpoint: this is used when we have jurisdictional restrictions needed to meet data requirements.
Finally, we need to retrieve the ID associated with our Cloudflare account.
There are two ways to retrieve it: it's in the URL for most parts of the dashboard: https://dash.cloudflare.com/#{ACCOUNT_ID}/r2/overview for example.
Otherwise, you can navigate to your buckets settings and check the header of the General section, where you will be presented with something like this:
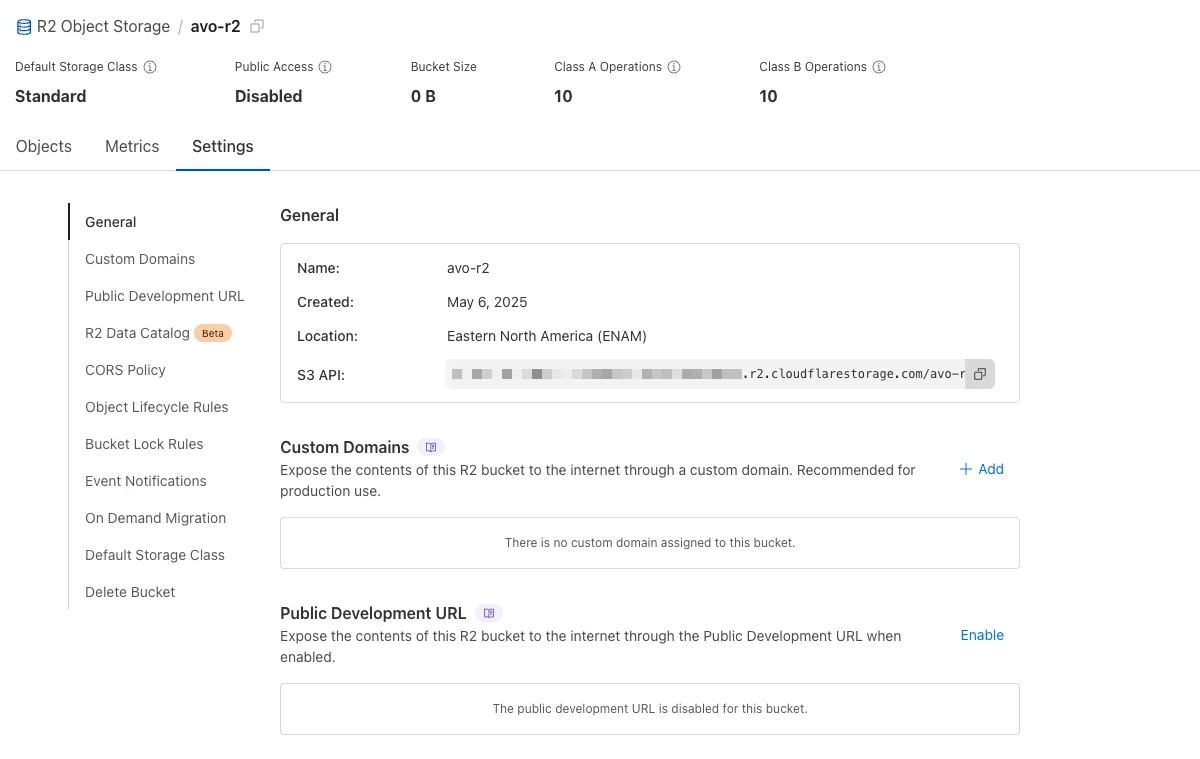
The account_id corresponds to the blurred section of this image.
Now that we have our credential's setup, let's configure Active Storage:
Develop apps 10 times faster with Avo
Develop your next Rails app in a fraction of the time using Avo as your admin framework.
Start for free today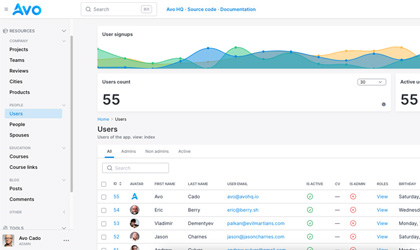
Active Storage configuration
Now that we have the tokens, let's configure Active Storage so we can upload files to our R2 bucket.
Let's start by opening an editor to keep our tokens using Rails credentials:
# Vim
EDITOR=vim bin/rails credentials:edit --environment=development
# VS Code
EDITOR='code --wait' bin/rails credentials:edit --environment=development
# Cursor
EDITOR='cursor --wait' bin/rails credentials:edit --environment=development
In there, let's remove the placeholder values and replace them with something like this:
cloudflare:
  account_id: YOUR_ACCOUNT_ID
  r2:
    account_api_token: YOUR_ACCOUNT_LEVEL_TOKEN
    access_key_id: YOUR_ACCESS_KEY_ID
    secret_access_key: YOUR_SECRET_ACCESS_KEY
    endpoint: YOUR_JURISDICTION_SPECIFIC_ENDPOINT
    bucket: YOUR_BUCKETS_NAME
Now, we can safely access these values in the storage.yml file, which is committed to our repository by default:
# config/storage.yml
cloudflare:
  service: S3
  endpoint: https://<%= Rails.application.credentials.dig(:cloudflare, :account_id) %>.r2.cloudflarestorage.com
  access_key_id: <%= Rails.application.credentials.dig(:cloudflare, :r2, :access_key_id) %>
  secret_access_key: <%= Rails.application.credentials.dig(:cloudflare, :r2, :secret_access_key) %>
  bucket: <%= Rails.application.credentials.dig(:cloudflare, :r2, :bucket) %>
  region: auto
The next step is to add the official aws_sdk_s3 gem, which Active Storage uses to upload files to S3-compatible APIs. Make sure to check the latest version of the gem whenever you're implementing this feature:
# Gemfile
gem "aws-sdk-s3", "~> 1.185", require: false
Make sure to have the image_processing gem if you will be using Active Storage's variants:
gem "image_processing", "~> 1.2"
Then, we can tell Active Storage to use the cloudflare service we defined in storage.yml:
# config/environments/development.rb
config.active_storage.service = :cloudflare
Now, after running bundle install and restarting our server, we should be set to go with file uploads.
However, if we try to upload a file with our current configuration, we will receive the following error: Aws::S3::Errors::InvalidRequest with the message You can only specify one checksum at a time.
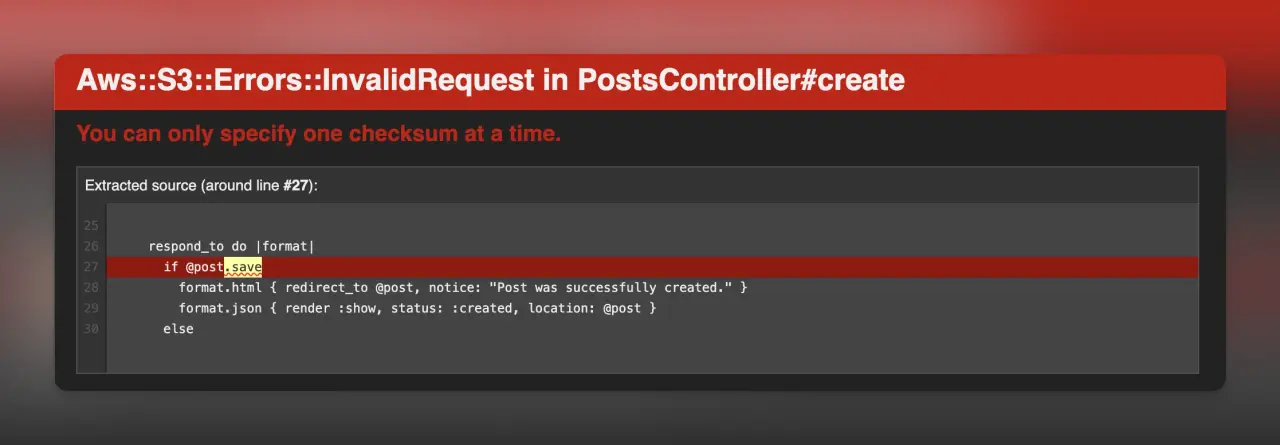
The error originates from the ActiveStorage::Blob.create_and_upload! method, which sends two checksums, something that's allowed by AWS but rejected by R2 in this case.
This problem seems to happen on newer versions of the AWS SDK, so setting a previous version is an alternative, but the easiest fix is to modify the configuration in storage.yml by adding the following:
request_checksum_calculation: "when_required"
response_checksum_validation: "when_required"
Now, after restarting the server, we can upload a file to R2:
Checking our R2 dashboard, we can see that the object was successfully uploaded:
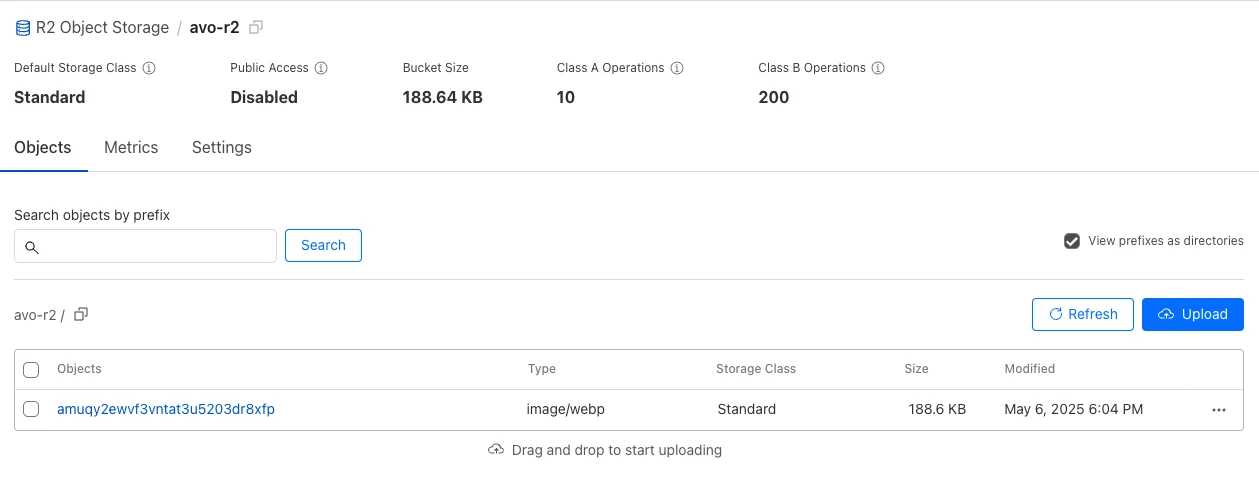
Everything is working now, but with this configuration, we won't be able to handle direct uploads like we did in the S3 uploads with Active Storage article.
Let's implement the feature with R2 as well:
Direct uploads
Sometimes, especially with customer-facing apps, we want the users to upload files directly from their browser to improve the perceived experience and save server resources.
To achieve this, we need to request a signed URL from our server, which has access to the Cloudflare keys, with information about the file we want to upload.
Then, the server responds with a signed URL, which we use to make a request to Cloudflare from the browser.
If the upload is successful, the cloud server returns information about the uploaded file, which we use to persist to our database.
The flow works like this:

To enable direct uploads, let's configure CORS in the Cloudflare dashboard:
Configuring CORS
CORS means Cross-Origin Resource Sharing, which is a way to allow a server to indicate the origins from which a browser should permit resource loading.
In other words, when our browser tries to upload a file to R2, the request is considered cross-origin, and it's not allowed.
To set CORS, we have to open our bucket's setting page and then navigate to the CORS Policy section, then click on the + Add button:
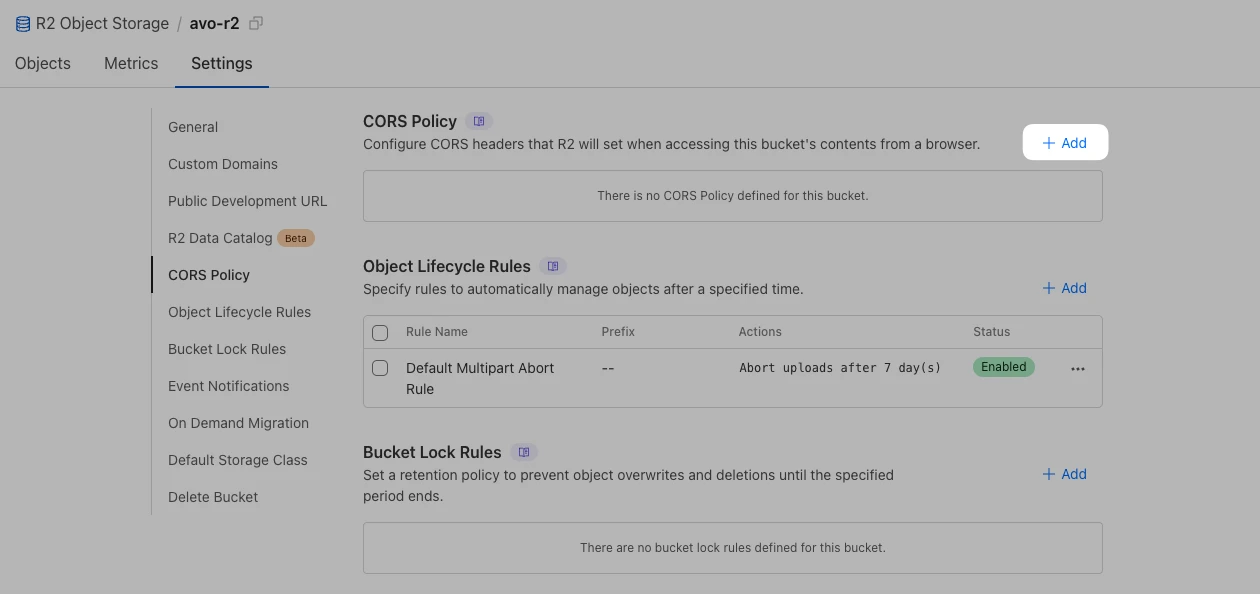
Then, we will be presented with a screen where we can edit our CORS policy, which by default is:
[
  {
    "AllowedOrigins": [
      "http://localhost:3000"
    ],
    "AllowedMethods": [
      "GET"
    ]
  }
]
We only have localhost:3000 GET requests, but those are not enough for direct uploads, so let's add the correct headers and methods:
[
  {
    "AllowedOrigins": ["http://localhost:3000"],
    "AllowedMethods": ["GET", "POST", "PUT"],
    "AllowedHeaders": ["Content-Type", "Content-Md5", "Content-Disposition"],
    "ExposeHeaders": ["Origin", "Content-Type", "Content-Md5", "Content-Disposition"],
    "MaxAgeSeconds": 3600
  }
]
We're adding POST and PUT requests, setting the AllowedHeaders which are the headers our application can send and setting the ExposeHeaders which are the headers that are exposed in the response from R2 and MaxAgeSeconds which defines how long the results of the preflight request can be cached.
If you're using a custom development domain or deploying the app to production, don't forget to add your domains to the AllowedOrigins array and try to keep those contained to origins you'll actually use.
Direct uploads with Active Storage
Now that we have our CORS policy correctly setup, we can easily add direct uploads.
The first step is to install the @rails/activestorage JavaScript dependency:
bin/importmap pin "@rails/activestorage" # If using Import maps
yarn add @rails/activestorage # If using JavaScript bundlers
Next, we have to import the ActiveStorage JS code and run ActiveStorage.start(), we can do that in application.js or in any other part of the app:
import * as ActiveStorage from "@rails/activestorage";

ActiveStorage.start();
Then, we just have to pass direct_upload: true to our file field form helper:
<%= form.file_field :cover, direct_upload: true %>
Now, we get direct uploads after we submit the form, but we won't notice any difference, so let's add an event listener to get an alert when the direct upload finishes:
window.addEventListener("direct-upload:end", (evt) => {
  alert("Direct upload started", evt)
})
TL;DR;
Cloudflare R2 is an S3-compatible cloud object storage service which provides some advantages regarding S3:
- No egress fees.
- Out of the box CDN integration.
- Simpler pricing
- A better experience with their dashboard.
Being compatible with S3, it means that we can use Active Storage just like we with S3 without making any further adjustments or writing any custom code.
The first step, provided we have a Cloudflare account, is to create the bucket we will use and gather the account_id, the bucket name, the access_key_id and secret_access_key and then safely store them with Rails credentials or environment variables if you prefer them.
Then, we add the following service to storage.yml:
cloudflare:
  service: S3
  endpoint: https://<%= Rails.application.credentials.dig(:cloudflare, :account_id) %>.r2.cloudflarestorage.com
  access_key_id: <%= Rails.application.credentials.dig(:cloudflare, :r2, :access_key_id) %>
  secret_access_key: <%= Rails.application.credentials.dig(:cloudflare, :r2, :secret_access_key) %>
  bucket: <%= Rails.application.credentials.dig(:cloudflare, :r2, :bucket) %>
  region: auto
  request_checksum_calculation: "when_required"
  response_checksum_validation: "when_required"
And that's it, we can have simple file uploads to R2 without any extra effort.
But, if you want to allow direct uploads, we have to configure CORS:
[
  {
    "AllowedOrigins": ["http://localhost:3000"],
    "AllowedMethods": ["GET", "POST", "PUT"],
    "AllowedHeaders": ["Content-Type", "Content-Md5", "Content-Disposition"],
    "ExposeHeaders": ["Origin", "Content-Type", "Content-Md5", "Content-Disposition"],
    "MaxAgeSeconds": 3600
  }
]
Then, we install the Active Storage JS code: yarn add @rails/activestorage or bin/importmap pin "@rails/activestorage".
We require it and call the start method in application.js or elsewhere:
import * as ActiveStorage from "@rails/activestorage";
ActiveStorage.start();
And finally, by passing direct_upload: true to the form.file_field helper we get direct uploads after users submit the form.
That's about it, now your application has direct uploads to Cloudflare R2 using Active Storage.
I hope you enjoyed the article and that it helped you build an awesome project with Rails. Have a good one!
