
Deploying an application to production is usually an enriching experience: real people can use and enjoy what you've built.
Unfortunately, bad actors are a part of the internet and can be harmful if left uncontrolled.
In this article, we will learn how to add Cloudflare Turnstile to a Rails application to prevent or mitigate unwanted or malicious requests to parts of our application.
Let's start by configuring everything on the Cloudflare side:
What we will build
To showcase the Cloudflare Turnstile, we will build a simple application with a signup form to show how we can integrate the widget to any form in our application.
We will add a Turnstile widget to each one of these forms and make two verifications:
- A client verification which is performed automatically by the widget in which Cloudflare determines if a user is human and returns a
token. - A server-side verification, where we will use the
tokenand verify it against Cloudflare's servers from our server. Only if this verification passes, we can consider the form safe for submission.
The final result will look like this:
Cloudflare setup
You are welcome to skip the application setup if you already have the keys needed to set the Turnstile.
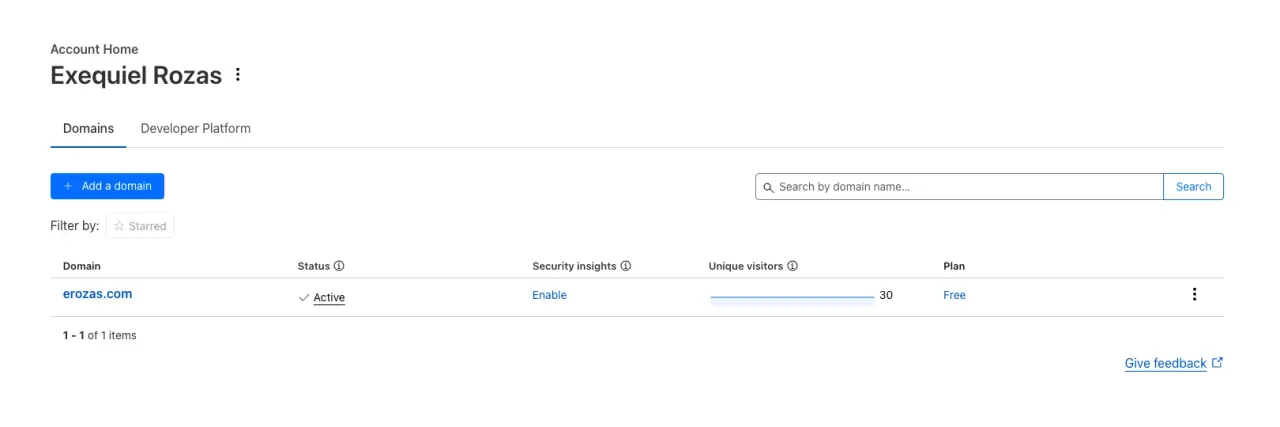
To set things up on Cloudflare's side, we need an account and to have the site we want to protect with Turnstile added to our lists of sites in the dashboard.
Our dashboard should look like this:
Then, we locate the Turnstile link in the sidebar and navigate there:
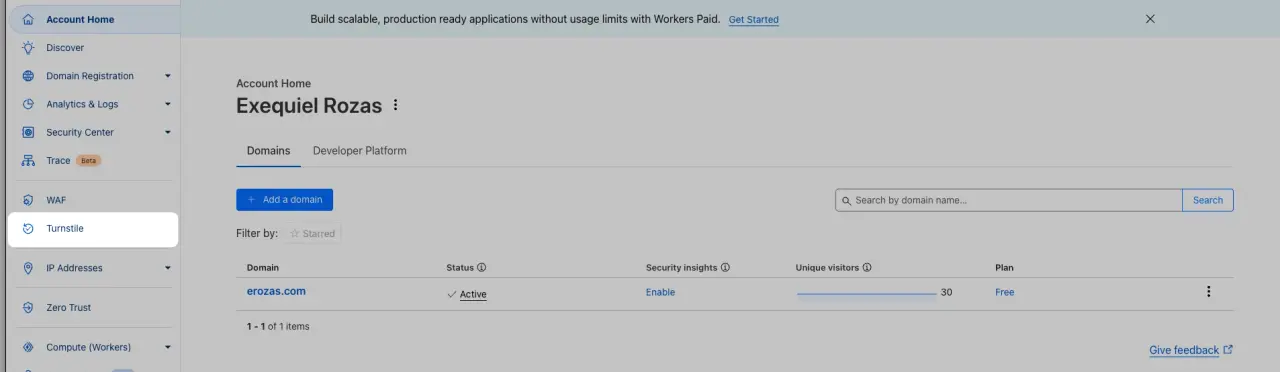
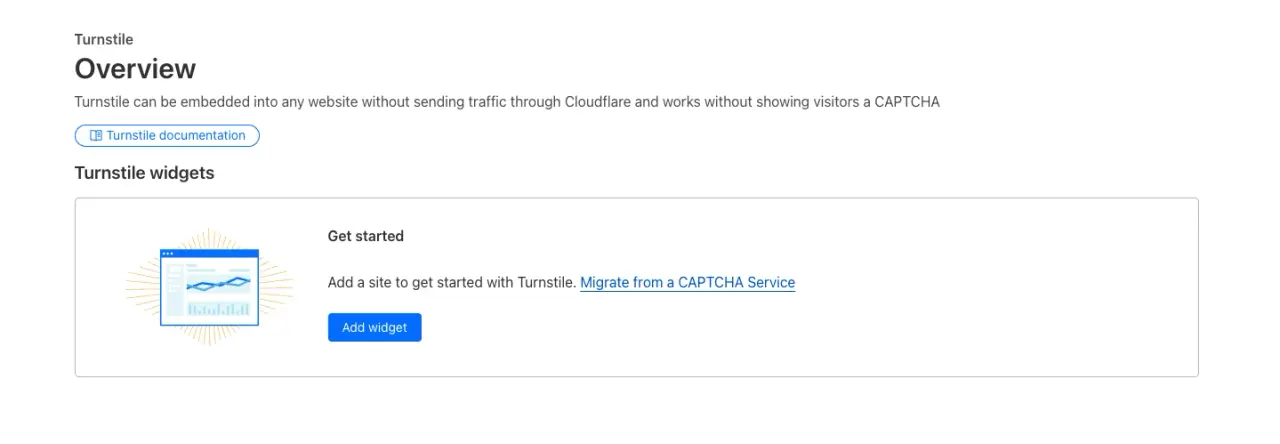
We are then presented with the Turnstile overview, where we have to click on the Add Widget button:
Next, we add information about the Turnstile and our site:
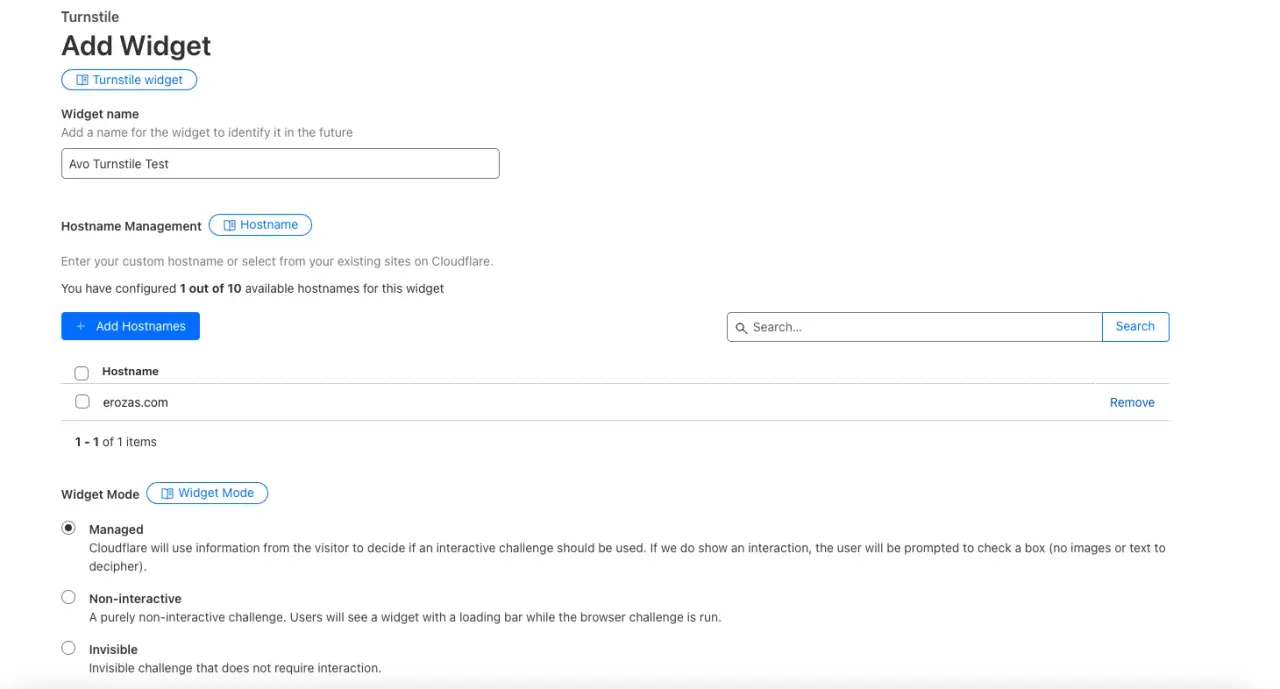
We gave the widget a test name of Avo Turnstile Test, added a hostname which should correspond to a site we've already added to Cloudflare, and then, for the Widget Mode, we chose the Managed option where Cloudflare picks information about the user and decides whether to show the widget or not while validating whether the visitor is human.
There's also a question of whether we want to opt for pre-clearance for the site, which means that, based on the previous security clearance of a given user, the Turnstile can be avoided.

I left No as it's the default option, and it marginally decreases the possibility for spam.
Finally, after clicking on the Create button, we get the SiteKey and SecretKey values:

Keep those values safely stored in your Rails credentials or environment variables if that's what you prefer.
Now that we have everything set up on Cloudflare, let's set up our application:
Further reading
Cloudflare R2 with Active StorageApplication Setup
We will build a simple application that has a comment form and a signup form using the Rails auth generator, where we will add the Cloudflare Turnstile to avoid unwanted submissions.
First, generate a new Rails application:
rails new turnstile --css=tailwind --javascript=esbuild
Let's add authentication like we did in the tutorial:
bin/rails generate authentication
Finally, we will add the Cloudflare keys to our credentials:
EDITOR=vim bin/rails credentials:edit --environment=development
With the following content:
cloudflare:
  turnstile_site_key: YOUR_SITE_KEY
  turnstile_secret_key: YOUR_SECRET_KEY
Finally, we will grab the Turnstile's script tag and add it to our application layout:
<%# app/views/layouts/application.html.erb %>
<%= javascript_include_tag "https://challenges.cloudflare.com/turnstile/v0/api.js?render=explicit", "data-turbo-track": "reload", defer: true %>
Adding the Turnstile to our application
The verification process for the Turnstile has two phases:
-
Client-side verification: the widget is rendered and using the
SiteKeyvalue, an<iframe>is loaded from challenges.cloudflare.com that runs the challenge on the user's browser and provides atokenwhich is stored in a hidden input with thecf-turnstile-responsename. -
Server-side verification: using the token provided by the widget, we make a POST request to Cloudflare's
siteverifyservice where we pass theSecretKeywe obtained before, the token and the request's IP. If this verification passes, we can safely continue with the form submission or action we were performing.
However, the widget rendering phase can be done implicitly by the JS we included in the application layout by defining an element with the .cf-turnstile class and also passing an onload parameter to the JS with a function name that will be run whenever the widget is loaded.
This is fine, but we will render the widget explicitly, and that's why we passed the render=explicit param.
To achieve the explicit rendering, we start by adding the HTML to the form we wish to protect from spam:
<div
  class="cf-turnstile mt-4"
  data-sitekey="<%= Rails.application.credentials.dig(:cloudflare, :turnstile_site_key) %>"
  data-size="flexible"
  data-theme="light"></div>
If we want the widget to occupy the full width of its container, we need to pass flexible to the size attribute. The same with the theme which can be light, dark or auto.
Now, we add the JavaScript that will render the widget:
// app/javascript/application.js
document.addEventListener("turbo:load", function() {
  const turnstileElement = document.querySelector(".cf-turnstile")

  if (turnstileElement && window.turnstile) {
    const siteKey = turnstileElement.dataset.sitekey

    window.turnstile.render(turnstileElement, {
      sitekey: siteKey,
    })
  }
})
As you can see, we evaluate the code after the turbo:load event, and we're querying for the turnstileElement which is the <div> we previously defined.
If that element and the window.turnstile are present, we render the widget by calling render on window.turnstile and passing the siteKey which we extract from the data attributes in the container div.
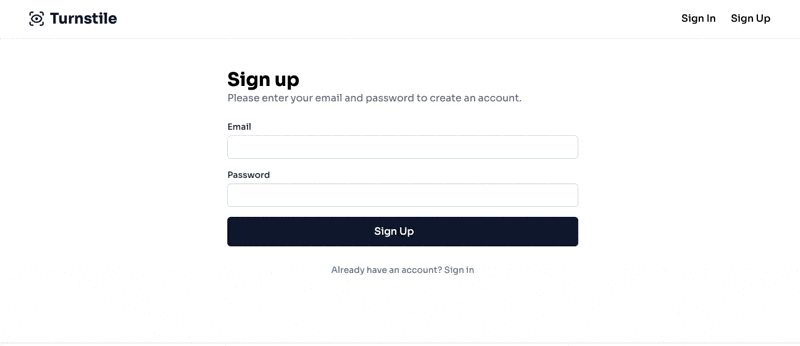
Now, if we load our form, we should see the following:
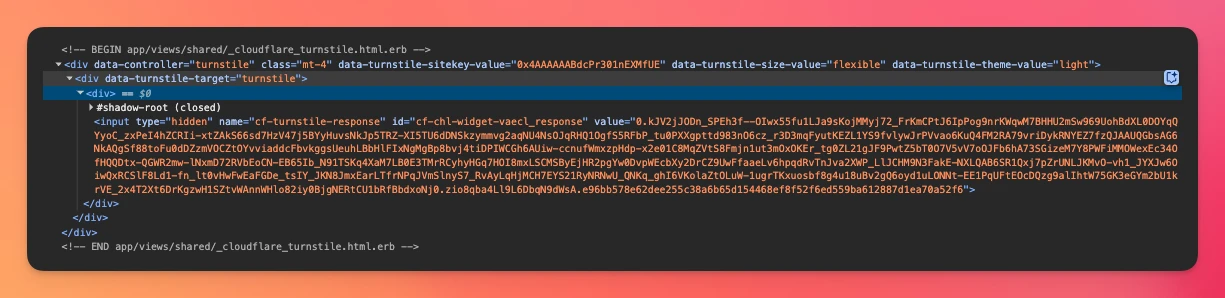
If we inspect the HTML after the Success message is shown, we can see the hidden input with the token:
Now, if we submit the form, we can get the token from the params.
Let's add server-side validation to complete the feature:
Server-side validation
Let's create a class that's responsible for making the requests to Cloudflare and validating tokens:
# lib/turnstile_verifier.rb
class TurnstileVerifier
  URI = URI("https://challenges.cloudflare.com/turnstile/v0/siteverify")
  MAX_RETRIES = 3

  attr_reader :token, :ip

  def initialize(token, ip)
    @token = token
    @ip = ip
  end

  def verify
    return false if token.blank?

    MAX_RETRIES.times do |attempt|
      begin
        response = send_request

        if response["success"] == true
          return true
        else
          Rails.logger.warn "Turnstile verification failed: #{response["error-codes"].inspect}"
          sleep(2**attempt) if attempt < MAX_RETRIES - 1
        end
      rescue StandardError => e
        Rails.logger.error "Turnstile verification error (attempt #{attempt + 1}/#{MAX_RETRIES}): #{e.message}"
        sleep(2**attempt) if attempt < MAX_RETRIES - 1
      end
    end

    false
  end

  private

  def send_request
    response = Net::HTTP.post_form(URI, {
      secret: secret_key,
      response: token,
      remoteip: ip
    })

    JSON.parse(response.body)
  end

  def secret_key
    Rails.application.credentials.dig(:cloudflare, :turnstile_secret_key).tap do |key|
      raise "Turnstile secret key is not configured" if key.blank?
    end
  end
end
This class receives a token and an ip and produces a boolean value when we call the verify method.
It also includes a basic retry logic with exponential back off, which re-attempts the requests at an increasing time frame to improve the chances of getting a successful response.
With that class defined, we then add a verify_turnstile action to our controller which is responsible for returning a flash message with an indication to complete the Turnstile challenge or else continue with the execution of the original action:
class RegistrationsController < ApplicationController
  allow_unauthenticated_access only: [:new, :create]
  before_action :verify_turnstile, only: [:create]

  # Rest of the code

  private
  def verify_turnstile
    turnstile_token = params["cf-turnstile-response"]
    is_valid =  TurnstileVerifier.new(turnstile_token, request.remote_ip).verify

    return if is_valid
    flash[:alert] = "Please complete the turnstile challenge to create an account."
    render :new, status: :unprocessable_entity
  end
end
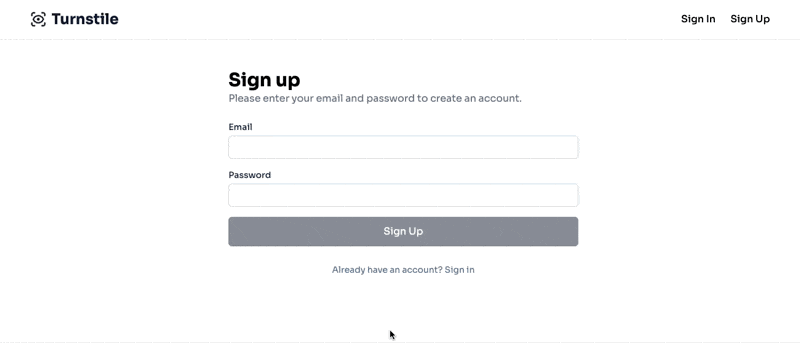
Now, if the Turnstile is approved on the client side, we should be able to submit our registration form and get the following result:
Extracting behavior
Now that we have the feature working, let's extract the widget's HTML to a partial and add a Stimulus controller to handle rendering:
<%# app/views/shared/_cloudflare_turnstile.html.erb %>
<div data-controller="turnstile"
  class="mt-4"
  data-turnstile-sitekey-value="<%= Rails.application.credentials.dig(:cloudflare, :turnstile_site_key) %>"
  data-turnstile-size-value="flexible"
  data-turnstile-theme-value="light">
  <div data-turnstile-target="turnstile"></div>
</div>
Then, we move the behavior to a Stimulus controller:
// app/javascript/controllers/turnstile_controller.js
import { Controller } from "@hotwired/stimulus"

export default class extends Controller {
  static values = {
    sitekey: String,
    size: String,
    theme: String,
  }

  static targets = ["turnstile"]

  connect() {
    if (this.turnstileTarget && window.turnstile) {
      window.turnstile.render(this.turnstileTarget, {
        sitekey: this.sitekeyValue,
        size: this.sizeValue,
        theme: this.themeValue,
      })
    }
  }
}
Now, after we include the partial in our form:
<%= render "shared/cloudflare_turnstile" %>
We get the same behavior as before, but now we can render the widget anywhere we want. Of course, we would have to add the server-side verification on the controller action we wish to protect.
Submit button feedback
To improve the user experience, let's make the forms submit button disabled and enable it only after the challenge has been successful.
This way, we are more clear about what the widget does.
First, let's make the submit button disabled:
<%= f.button type: "submit", class: "w-full flex items-center justify-center gap-2 px-4 py-3 text-white bg-slate-900 rounded-md hover:bg-slate-800 focus:outline-none focus:ring-2 focus:ring-slate-500 focus:ring-offset-2 transition-colors duration-300 disabled:opacity-50 disabled:cursor-not-allowed", disabled: true do %>
  <span>Sign Up</span>
<% end %>
Now, in the Stimulus controller, let's add the behavior on callback:
// app/javascript/controllers/turnstile_controller.js
import { Controller } from "@hotwired/stimulus"

export default class extends Controller {
  static values = {
    sitekey: String,
    size: String,
    theme: String,
  }

  static targets = ["turnstile"]

  connect() {
    if (this.turnstileTarget && window.turnstile) {
      window.turnstile.render(this.turnstileTarget, {
        sitekey: this.sitekeyValue,
        size: this.sizeValue,
        theme: this.themeValue,
        callback: () => {
          this._enableClosestSubmitButton();
        }
      })
    }
  }

  _enableClosestSubmitButton() {
    if (this.closestSubmitButton) {
      this.closestSubmitButton.removeAttribute("disabled");
    }
  }

  get closestSubmitButton() {
    return this.element.closest("form").querySelector("button[type='submit']");
  }
}
Which produces the following result:
TL;DR
Preventing spam submissions or automated requests to our application is important to avoid filling our database with junk or having our email sending reputation damaged.
There are multiple ways to prevent spam but, in this article, we used the Cloudflare Turnstile, which works as an unobtrusive captcha that doesn't require too much user input.
The first step to implementing it is to register our site in the Cloudflare dashboard to obtain a SiteKey and a SecretKey which we will use to render the Turnstile and to validate the token it returns.
Then, we include the JavaScript tag to load the widget in our application layout:
<%= javascript_include_tag "https://challenges.cloudflare.com/turnstile/v0/api.js?render=explicit", "data-turbo-track": "reload", defer: true %>
Next, we add the HTML to render the widget in any view with a form, and we pass the SiteKey we obtained before as a data attribute. If we want the widget to cover the full width, we add the flexible value for the size attribute:
<div class="cf-turnstile"
    data-sitekey="<%= Rails.application.credentials.dig(:cloudflare, :turnstile_site_key) %>"
    data-theme="light"
    data-size="flexible"></div>
As we're passing the render=explicit parameter, we need to define the render logic in the client. The turnstileElement variable represents the actual div with the .cf-turnstile class, and then we access the turnstile object from the browsers window:
// app/javascript/application.js
document.addEventListener("turbo:load", () => {
  const turnstileElement = document.querySelector(".cf-turnstile")

  if (turnstileElement && window.turnstile) {
    const siteKey = turnstileElement.dataset.sitekey

    window.turnstile.render(turnstileElement, {
      sitekey: siteKey
    })
  }
})
This will load the widget every time the turbo:load is fired and a <div> with the .cf-turnstile class is present.
Then, after Cloudflare performs the human verification on the user's client, a hidden input with the cf-turnstile-response name attribute is added to the turnstileElement div with the token that Cloudflare returned as the value.
Now, after the user posts the form, we can access the token and verify it by making a POST request to Cloudflare's siteverify service with the SecretKey, the token we obtained and the remote IP for the request.
If the token is valid, the response will have a success key that evaluates to true, and we can proceed with the form submission assuming that the request is coming from a human.
There are many things that we can customize, but the flow is basically this. Don't hesitate to read Cloudflare Turnstile's documentation to make sure things work for you.
I hope this article was useful and that you can implement the feature to avoid the annoying and harmful spam requests.
Have a good one and happy coding!
